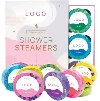


Making your own bath bombs is genuinely easier than most people expect. But there's a learning curve, and a few precautions that matter more than you'd think. Here's what I've figured out through trial, error, and a few stained bathtubs.
Why Make Your Own Bath Bombs?
Cost Savings That Actually Add Up
Let's talk numbers. A decent store-bought bath bomb runs $6 to $12 each. When you buy bath bomb ingredients in bulk - baking soda, citric acid, coconut oil, a few colorants - your cost per bomb drops to roughly $1 to $2. One bag of citric acid and one box of baking soda can yield 8 to 12 bath bombs easily.
That's not nothing. If you take a couple of baths a week, you're saving real money over a year. And the upfront ingredient investment pays for itself within one or two batches.
Full Control Over What Touches Your Skin
Commercial bath bombs often contain synthetic fragrances, artificial dyes, and ingredients that don't even make it onto the label in clear terms. If you've got eczema, fragrance sensitivities, or just prefer knowing what's going into your bathwater, DIY gives you that power.
You pick your own skin-safe colorants. You choose fragrance oils with published safety data. You decide whether to skip certain ingredients entirely. That kind of control matters, especially if your skin tends to react to mystery formulas.
It's a Surprisingly Fun Creative Outlet
I didn't expect to enjoy this as much as I do. Experimenting with seasonal scents, layering colors, figuring out which combinations look best dissolving in water - it scratches a creative itch. They also make genuinely thoughtful gifts. And if you've got kids old enough to help (with supervision around the citric acid), it doubles as a pretty entertaining afternoon project.
Essential Bath Bomb Ingredients - What You Actually Need
The Core Two: Baking Soda and Citric Acid
Everything starts with the citric acid baking soda ratio. The standard is 2 parts baking soda to 1 part citric acid. This is what creates the fizz - the acid-base reaction when it hits water.
Get this ratio wrong and things go sideways fast. Too much citric acid and the fizz is aggressive but the bomb crumbles. Too much baking soda and you get a dense puck that barely reacts. Stick with 2:1 as your baseline and adjust from there once you've made a few successful batches.
Binding Agents and Moisturizers
You need something to hold everything together. Coconut oil is the most common choice - it melts at low temperatures, binds the dry ingredients, and leaves skin feeling soft. Shea butter works similarly but gives a firmer bomb. Polysorbate 80 is worth mentioning too: it's an emulsifier that helps oils and colors disperse in water instead of leaving a ring around your tub.
One thing to know: heavier oils mean more bathtub residue. If you hate cleaning the tub after, lean toward lighter oils or add polysorbate 80 to your formula.
Color, Scent, and Extras
For color, you've got options. Mica powders give gorgeous shimmer and generally don't stain, but they need polysorbate 80 to disperse in water. Food coloring is cheap and accessible but can stain tubs and skin. Lake dyes sit somewhere in between - more stable than food coloring, less sparkly than mica.
For scent, essential oils and fragrance oils both work. Essential oils are plant-derived but not automatically "safer" - they have maximum usage rates for skin contact. Fragrance oils are synthetic blends designed for cosmetic use, often with published safety data. Either way, don't overdo it.
Optional extras? Dried lavender buds, Epsom salts for muscle relaxation, kaolin clay for a silkier feel, biodegradable glitter if you want sparkle without the microplastic guilt.
Step-by-Step Process (Concise Overview)
Mixing Dry Ingredients
Sift your baking soda, citric acid, cornstarch, and Epsom salt together into a large bowl. I mean actually sift them - a fine mesh strainer works. Clumps in your dry mix become lumps in your finished bomb, and lumps mean weak spots that crack later.
Combining Wet Ingredients Separately
In a separate small bowl, mix your melted coconut oil (or whatever oil you're using), colorant, and fragrance. Combining these first means the color distributes evenly instead of creating random concentrated spots.
Here's the critical technique: when adding the wet mixture to the dry, spritz - don't pour. Use a spray bottle for any additional liquid. Pouring triggers premature fizzing, which means your bomb loses its reaction power before it ever hits the bathtub. You want the mixture to feel like damp sand. Squeezable, clumpy, but not wet.
Molding and Packing Techniques
Bath bomb mold techniques matter more than people realize. Overfill each half slightly, then press the two halves together firmly. Don't twist - that creates a weak seam. Hold for a moment, then gently tap one side to release.
Metal sphere molds are the classic choice and produce clean results. Silicone molds are more forgiving for beginners and come in fun shapes. Free-form shaping works too if you're not picky about perfect spheres.
Let them cure 24 to 48 hours in a dry environment. Not the bathroom. A bedroom closet, a pantry shelf - somewhere with low humidity and stable temperature.
Tips That Separate a Good Bath Bomb From a Great One
Humidity Is Your Biggest Enemy
Ambient moisture activates the citric acid reaction. If you're mixing on a humid day, you might notice the mixture starting to puff or feel sticky before you've even molded it. Work fast, pick a low-humidity day if possible, and definitely don't mix in the bathroom where lingering shower steam hangs around.
Don't Eyeball Measurements
Get a kitchen scale. Seriously. Measuring cups introduce inconsistency because powders pack differently depending on how you scoop them. Even small ratio deviations change the texture and performance of your finished homemade bath fizzy. A scale costs $10 and makes everything reproducible.
Test Small Batches First
Before you commit a full bottle of expensive essential oil or a pricey mica pigment to a big batch, make 2 or 3 test bombs. Drop one in water. Watch the fizz duration, see how the color behaves, check whether it stains, notice the scent strength. Then adjust before scaling up.
Curing Time Isn't Optional
I've tried rushing this. It doesn't end well. Bombs that aren't fully cured crack, crumble, or sometimes slowly expand into misshapen blobs over a few days. Give them the full 24 to 48 hours. Once cured, wrap individually in plastic wrap or use shrink wrap bags. They'll stay fresh for months.

Precautions You Shouldn't Skip
Citric Acid Safety
Citric acid is a skin and eye irritant in powder form. If you have sensitive hands, wear gloves while mixing. Don't rub your face mid-process (learned that one the uncomfortable way). And keep the powder away from kids and pets - inhaling fine citric acid dust isn't pleasant for anyone.
Essential Oil Dos and Don'ts
Essential oils have maximum dermal usage rates established by organizations like IFRA for good reason. More isn't better. Some oils - cinnamon bark, clove bud, wintergreen - are particularly harsh at higher concentrations and can cause burns or irritation in bath products where they sit on skin in warm water.
Never add undiluted essential oils directly to bathwater. They don't disperse - they float on the surface in concentrated droplets and can irritate or burn skin on contact. In a bath bomb, they're diluted within the formula, which is the safe way to use them.
Colorant Staining Risks
Some pigments stain bathtubs, grout lines, or skin. Before using a new colorant in a full-sized bomb, test it: drop a pinch into a small bowl of water and let it sit on a white surface for 30 minutes. Micas generally perform better than liquid dyes when it comes to avoiding bathtub rings, especially when combined with polysorbate 80.
Allergies and Patch Testing
Do a forearm patch test 24 hours before doing a full soak with a new recipe. Dab a bit of the dissolved mixture on your inner arm, cover with a bandage, and wait. "Natural" doesn't mean universally safe - botanicals like lavender, chamomile, and citrus oils trigger reactions in some people.
Keep It Sanitary
Clean your molds, bowls, and utensils between batches. Homemade bath fizzies don't contain preservatives, so introducing bacteria or moisture shortens their shelf life. Stored properly in a cool, dry place, they last about six months.
Common Mistakes Beginners Make (And How to Fix Them)
Bath Bombs Expanding or Cracking After Molding
This usually means too much liquid or humidity exposure during mixing. Cut back your wet ingredients slightly next time, or add a tablespoon more cornstarch to absorb excess moisture.
Bombs That Won't Hold Together
Either you don't have enough binding oil, your citric acid baking soda ratio is off, or you simply didn't pack the mold firmly enough. The mixture should hold its shape when squeezed in your fist. If it doesn't, add a tiny bit more oil - a half teaspoon at a time.
Weak or No Fizz
Check your citric acid. Old citric acid loses potency, especially if it's been exposed to air. Also, too much oil in the formula can coat the citric acid particles, preventing them from reacting with water properly. Pull back on oils if your fizz is underwhelming.
Colors Look Dull in Water
If you're using mica and the color just floats on the surface looking sad instead of tinting the water, you need polysorbate 80. Without it, mica doesn't disperse - it clings to oils and sits on top. A teaspoon of polysorbate 80 per bomb usually solves this.
FAQ
Q: Can I Use Bath Bombs If I Have Sensitive Skin?
A: Yes, but go minimal. Skip fragrance oils, use gentle colorants or no color at all, and always do a patch test first. A simple baking soda, citric acid, and shea butter formula with nothing else is a good starting point for reactive skin.
Q: What's The Best Citric Acid To Baking Soda Ratio For Beginners?
A: Start with the classic 1:2 ratio - one part citric acid to two parts baking soda. It's forgiving, produces reliable fizz, and holds together well. Once you're comfortable, you can adjust slightly based on your climate and how intense you want the fizz.
Q: Are Homemade Bath Bombs Safe For Kids?
A: Generally yes for children over 3. Skip essential oils or use very low concentrations (a single drop per bomb). Avoid embedding small objects like beads or charms that could pose a choking risk. And supervise - bath time with a fizzing, colorful bomb is exciting enough that kids might try to taste it.
Q: How Do I Store Bath Bombs So They Don't Go Flat?
A: Wrap each one individually in plastic wrap, then store them in an airtight container in a cool, dry place. Not the bathroom - the humidity there slowly activates the fizz reaction over time. A bedroom closet or kitchen cupboard works well.
Q: Why Do My Bath Bombs Smell Great Dry But Lose Scent In Water?
A: Hot water disperses volatile fragrance molecules quickly. You can increase your fragrance load slightly (staying within safe dermal limits), anchor the scent with kaolin clay which holds onto fragrance better, or accept that bath bomb scent is strongest in the first few minutes of dissolving. Some fragrance oils have better "staying power" in water than others - testing is the only way to know.