
I'll be upfront: my first batch of soap came out looking like a science experiment gone wrong. Lumpy, streaky, and weirdly soft in the middle. But that batch taught me more than any tutorial I'd watched beforehand. If you're curious about making real soap at home - not the melt-and-pour kind, but actual soap from scratch - this guide is the kind I wish I'd had on day one.
Why More People Are Making Soap at Home
There's something quietly satisfying about pulling a tray of fresh-cut soap out of a mold and knowing exactly what went into it. No mystery ingredients, no fragrance numbers, no preservatives you can't pronounce. Just oils, water, lye, and whatever you decided to throw in for fun.
People come to soap making for different reasons. Some have sensitive skin and are tired of breakouts. Others want a creative outlet. A few just like the idea of making something useful from raw materials. Whatever your reason, the craft itself tends to stick once you try it.
The Problem With Commercial Soaps
Most "soap" on store shelves isn't actually soap. It's a detergent bar - synthetic surfactants pressed into a familiar shape. The glycerin that naturally forms during real soap making? Usually extracted and sold separately to the lotion industry. That's part of why drugstore bars can leave your skin feeling tight.
I'm not here to scare anyone off commercial products. They have their place. But once you've used a handmade bar, the difference in how your skin feels afterward is hard to ignore.
What "All-Natural" Actually Means
"Natural" is a fuzzy word. For our purposes, it means soap made from plant or animal fats, water, and lye - plus optional natural additives like essential oils, clays, herbs, and botanical colorants. No synthetic fragrance oils, no artificial colors, no preservatives shipped from a lab.
The Science Behind Soap (Without the Headache)
You don't need a chemistry degree to make soap, but knowing what's happening helps you troubleshoot when things go sideways.
Lye and Oil Saponification Explained
Saponification is the reaction between fats (your oils) and a strong base (sodium hydroxide, aka lye). When the two meet, they rearrange themselves at the molecular level. The result? Soap molecules and glycerin. That's it. That's the magic.
Every oil has a specific amount of lye it needs to fully saponify - which is why precise measurements matter so much. Too little lye and you get a greasy mess. Too much and the bar is harsh enough to irritate your skin.
Why You Can't Skip the Lye
Here's a myth that won't die: "real natural soap doesn't use lye." Sorry, but it does. All soap, going back thousands of years, requires some form of alkali. The good news? When the saponification process finishes, there's no lye left in the finished bar. The chemistry consumes it entirely.
Tools and Ingredients You'll Need
You probably already own half of this. The rest is cheap.
Basic Equipment Checklist
Digital kitchen scale (non-negotiable)
Stick blender (a thrift store one works great)
Stainless steel pot - never aluminum
Silicone molds or a lined wooden loaf mold
A thermometer, ideally infrared
Safety goggles and chemical-resistant gloves
One honest tip: keep your soap-making gear separate from your cooking gear. Not because it's dangerous after the fact, but because residual oils and soap traces are a pain to fully clean.
Choosing Your Oils and Fats
Each oil contributes something different. Olive oil makes a gentle, conditioning bar but can be soft on its own. Coconut oil adds hardness and big bubbly lather, though too much can dry out skin. Castor oil boosts lather and creaminess. Shea butter brings a luxurious, conditioning quality.
Most beginner formulas use a blend - usually three or four oils - to balance hardness, lather, and skin feel.
Essential Oils for Soap and Natural Additives
Lavender is the classic starter scent because it's affordable and survives saponification well. Peppermint, tea tree, eucalyptus, and rosemary also hold up nicely. Citrus essential oils, sadly, tend to fade - you'll need more than you'd think, or an anchor like litsea cubeba.
For extras: oatmeal for gentle exfoliation, kaolin clay for slip, dried calendula petals for visual appeal, raw honey for a creamy lather. Start simple.
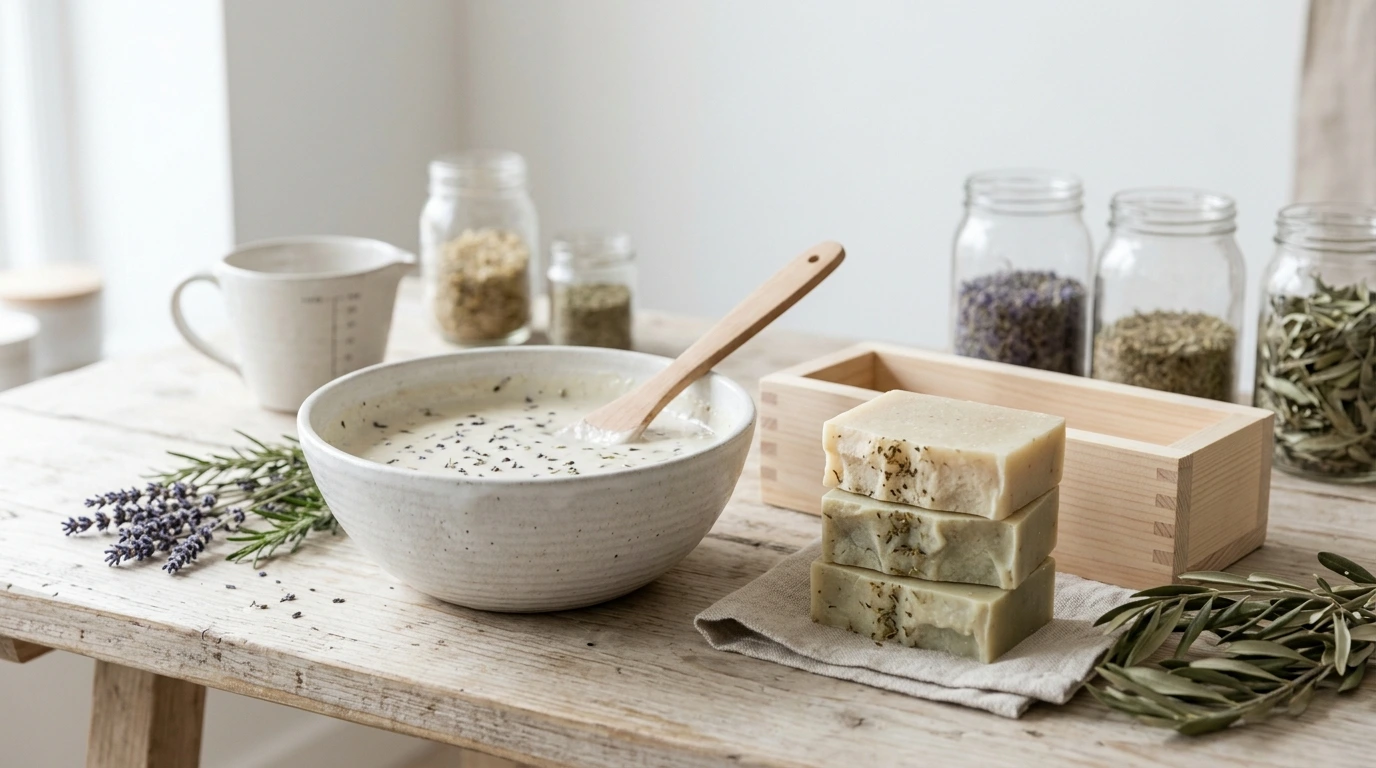
The Cold Process Soap Making Method, Step by Step
This is the part where I pretend you're standing in my kitchen.
Step 1 - Prep Your Workspace and Gear Up
Clear the counter. Open a window or turn on the range hood. Send the kids and pets to another room. Put on your goggles and gloves before you touch the lye container.
Step 2 - Measure Everything by Weight
This trips up beginners constantly. Soap recipes are measured in grams or ounces by weight, not by volume. A cup of olive oil and a cup of coconut oil weigh different amounts. Your scale is your best friend here.
Step 3 - Mix the Lye Solution Safely
Always pour the lye into the water - never water into lye, which can cause a volcanic reaction. The mixture will heat up fast, sometimes hitting 90°C (200°F), and release fumes for about a minute. Stir gently, then set it aside to cool. Step back while it off-gasses.
Step 4 - Warm and Combine Your Oils
Melt your solid oils (coconut, shea) and combine them with your liquid oils in your stainless steel pot. Aim to have both your lye solution and your oils sitting around 38–43°C (100–110°F) when you mix them. Close enough is fine - you don't need lab precision.
Step 5 - Bring Lye and Oils Together
Slowly pour the lye solution into the oils. Use your stick blender in short pulses, alternating with hand stirring. Within a few minutes, the mixture will thicken to something resembling thin pudding. That's "trace" - when a drizzle of batter leaves a faint trail on the surface before sinking back in.
Step 6 - Add Scents, Colors, and Extras
Once you hit trace, stir in your essential oils, clays, or botanicals. Work fast - some additives accelerate trace dramatically. If your batter starts setting up in the pot, scoop it into the mold and smooth the top as best you can.
Step 7 - Pour, Insulate, and Wait
Pour into your prepared mold. Cover with a piece of cardboard and wrap in a towel to hold in heat. Leave it alone for 24–48 hours. During this time, saponification continues and the soap goes through a "gel phase" where the center heats up and looks translucent. This is normal.
Curing Your Soap (The Part Most Beginners Rush)
I know. You just made soap. You want to use it. But please wait.
Why 4 to 6 Weeks of Curing Matters
Once unmolded and sliced, the bars need time to cure. Water evaporates, the structure firms up, and the lather becomes noticeably creamier. A bar used at one week feels mediocre. The same bar at six weeks feels luxurious. Same recipe - just patience.
How to Store Curing Bars
Stand them on edge on a wire rack or piece of parchment, with air space between each bar. Keep them somewhere cool, dry, and out of direct sunlight. Flip them every few days for the first week.
A Simple Beginner Recipe to Try First
Classic Olive, Coconut, and Castor Bar
A foolproof starter blend: 60% olive oil, 25% coconut oil, 15% castor oil. Run those percentages through a free online lye calculator (SoapCalc and Bramble Berry have good ones) to get the exact lye and water amounts for your batch size.
The finished bar is gentle, decently hard after curing, and produces a creamy lather with light bubbles. Nothing flashy - but a solid foundation to build on.
Common Mistakes to Watch For
Seizing: batter turns to concrete in seconds, usually from a problematic fragrance. Glop it into the mold anyway - it usually still becomes soap.
False trace: the mixture looks thick but hasn't actually saponified. Common when oils are too cool. Keep blending.
Soda ash: a harmless white film on top. Spray with rubbing alcohol right after pouring, or just trim it off later.
Soft bars: usually too much water or too much soft oil. Cure longer or adjust the recipe.
Customizing Your Handmade Soap Recipes
Swapping Oils Without Wrecking the Batch
Every time you change an oil - even slightly - recalculate your lye amount. Always. Most recipes also use a "superfat" of 5%, meaning 5% of the oils are left unreacted to nourish skin. Higher superfat means a more conditioning but softer bar.
Natural Colorants Worth Trying
Indigo gives soft blues, madder root produces dusty pinks and reds, activated charcoal makes dramatic blacks and greys, spirulina lends a muted green, and cocoa powder makes warm browns. Add them at trace, usually pre-mixed with a little oil to avoid clumps.

Safety Reminders Worth Repeating
Handling Lye the Right Way
Store it in a clearly labeled, airtight container away from children, pets, and humidity. If lye touches your skin, rinse with cool running water for several minutes. Old advice said to neutralize with vinegar - don't. Water is what you want.
When to Walk Away From a Batch
If your soap separates into oily layers and won't come back together, or if it cracks deeply and oozes liquid days later, sometimes the kindest thing is to toss it. Not every batch is salvageable, and that's okay. It happens to everyone.
FAQ
Q: Is Homemade Soap Actually Safer Than Store-Bought?
A: "Safer" is a stretch - both are safe when made properly. But homemade soap is often gentler on sensitive skin because it retains natural glycerin and skips synthetic fragrances and detergents that commonly trigger irritation.
Q: Can I Make Soap Without Lye?
A: No. All real soap requires lye to saponify. If you want to avoid handling it directly, melt-and-pour bases let you skip that step - the saponification was done for you at the factory.
Q: How Long Does A Bar Of Homemade Soap Last?
A: Usually 3–6 weeks of daily use, depending on the recipe and how you store it. To extend its life, keep the bar on a draining soap dish that lets it dry fully between uses. A wet bar sitting in a puddle melts away fast.
Q: What's The Difference Between Cold Process And Hot Process Soap?
A: Cold process (what we covered) cures slowly over weeks and produces smooth, refined-looking bars. Hot process cooks the saponification reaction in a slow cooker, finishing in hours rather than weeks. Hot process bars are usable sooner but tend to look more rustic.
Q: Do Essential Oils Survive The Saponification Process?
A: Some do, some don't. Lavender, peppermint, tea tree, patchouli, and litsea cubeba hold up well. Citrus oils mostly fade. To anchor lighter scents, blend them with a base note like benzoin or use them at higher concentrations. Expect some trial and error - that's part of the craft.